
I found a few patterns, and I am sharing them with you!
An excellent place to go is Ravelry.com - a free site for knitters and crocheters.
Here are a few others I found...
 |
-- Once you make your first couple of crocheted diaper covers, you'll be hooked, and so will your little one!
Click for pattern: Quick to Crochet Baby Boy Soakers
 |
-- Julia says,
I wanted something absorbent, so I chose the front and back post stitches to give it extra padding. The moms who have tried them have been excited about how well the diaper covers work.
Click for the pattern: Curling Baby Set
 |
-- The first one is super easy!
This pattern is written in four sizes
Click for the pattern: Little Fire Crochet Soaker Pants
 |
- Allows you to select the closure method you prefer. A Snappi works excellently, and so do diaper pins!
Click for the pattern: Tickle Turdle Wool Wrap
 |
-- Crochet it, put it on your baby, and adore how cute it looks!
Click for the pattern: Rolled Edge Wool Soakers Pattern
(archived on the Wayback Machine)
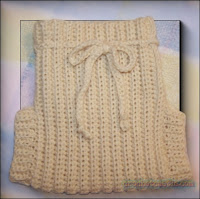 |
-- This soaker pattern is the simplest of the simple to crochet. It is very economical and will fit most babies from start to finish because it is so S-T-R-E-T-C-H-Y. Even the most novice of crocheters can work it up in no time.
Click for the pattern: Easiest Crochet Wool Soaker Pattern
 |
-- Although these pants can be knitted, Stephanie found it faster to crochet them. All I need to make a pair is a size
Jcrochet hook and four ounces of wool.
Click for the pattern: Learn to Crochet Wool Diaper Covers
More Free Crochet Diaper Cover Patterns:
🚼 13 Crochet Diaper Cover Patterns🚼 Princess Diaper Cover
🚼 Mickey and Minnie Inspired Crochet Diaper Covers
🚼 Bubbly Diaper Cover
🚼 Adirondack Babie Crocheted Soaker
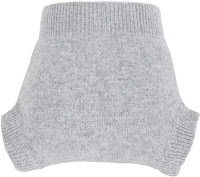 |
| Reusable Diaper Cover |
More Frugal Diaper Covers and Soakers:
🚼 Frugal Diaper Sewing: Easy Homemade Soaker🚼 Frugal Diapering: Free Crochet Wool Soaker patterns
🚼 FREEBIE: Knit/Crochet/Sew Soaker patterns
🚼 Frugal Diaper Sewing: Free Diaper and Cover Patterns
🚼 Frugal Sewing: Make your own diaper cover pull-on
🚼 Diaper Sewing: Making a fleece pull-on pant
🚼 Frugal Diapering: Make Your Own Baby Bum Sweaters
🚼 Diaper Sewing: More Free Wool Soaker Patterns
🚼 Diaper Sewing: 2-layer fleece soaker
🚼 Diaper Washing: Washing Wool Soakers
 |
| 100% Merino Wool Diaper Cover |
Shopping Suggestions:
🚼 Ready-Made Baby Wool Diaper Covers🚼 Crochet Diaper Cover Patterns
🚼 100% Merino Wool Yarn | super-fine and soft
🚼 Fishermen's Wool Yarn | 100-Percent Pure Virgin Wool
🚼 100% Wool Yarn
🚼 Bamboo Handle Crochet Hooks
🚼 Boye Aluminum Crochet Hook Set

Ingredients:
🧼 one bar Fels Naptha soap, grated (2-3oz bars or 1 4-5.5oz bar) (the finer grated the better)🧼 one cup washing soda
🧼 5 gallon bucket
🧼 Water
Directions:
Place grated soap in a small saucepan and cover it with water.If you let this sit overnight, it is MUCH faster.
Heat on low until dissolved - don't stir too rapidly or too much, it will get foamy and you won't be able to see if it dissolved.
If you let it sit overnight, it takes roughly 20 minutes to dissolve.
If you didn't let it sit, it takes much longer.
 |
| Fels-Naptha Laundry Bar Soap |
Stir to combine.
Add 1 cup of washing soda and mix well.
Don't reverse the order or it won't turn out.
As it cools it will thicken.
Use about 1/2 cup for diapers.
And 1-2 cups for other types of laundry.
 |
| Plastic Bucket |
I pour it into gallon jugs while it is still warm.
If you do this, only fill 3/4 of the way.
You will want to shake it to get it to mix and will need the room.
I learned this the hard way. LOL.
You can customize your detergent by adding essential oils to it.
Only add to the current jug you are using, because it loses its smell.
It is very soft without fabric softener.
If you add fabric softener, it makes clothes feel funny.
Thanks to Judi Sutherland for this Frugal Baby Tip!
 |
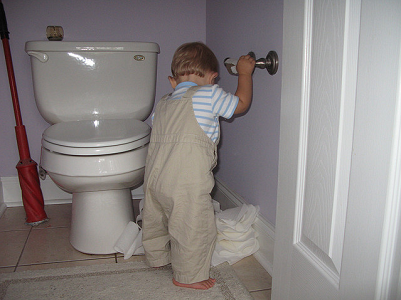
Would you like to prevent your toddler or pets from unrolling the entire roll of toilet paper, stuffing it into the toilet, or trailing it through the house?
Make your own toilet roll cover/protector by recycling a plastic 2-liter soda pop bottle.
 |
Cut off the bottle top and bottom of the soda pop bottle, to form your toilet roll cover/protector.
Measure your wall-mounted toilet paper roll holder to see what size you need—mine was 4 3/4 inches (12 cm) across.
TIP: You can use the leftover bottom to make fancy flower-shaped ice cubes for punch and the leftover top as a funnel for sand play!
 |
If you are using double-roll toilet paper, simply cut across completely—from one side to the other.
 |
If using double-roll toilet paper, use a piece of plastic tape to tape across the open sides, attaching both sides. Leave an opening of about 1/4 inch (0.64 cm) or larger for the toilet paper to hang out.
 |
Remove your toilet roll and spindle from the wall mount, slide both inside your new toilet roll protector, and reattach the roll to the wall mount.
This should at least slow your toddler or pets down!
Thanks to Catherine for this Frugal Baby Tip!
Tutorial Photos credit: Catherine McDiarmid-Watt - All rights reserved
More Ideas - Video Tutorials:
🧻 Cat Proof Toilet Paper Holder—Our cats like to claw at everything, especially our toilet paper. In this video, I'm going to make a cat-proof toilet paper holder, and you can, too!
🧻 Plastic Bottle Recycling Ideas—Tissue Holder—This is a Plastic bottle recycling ideas project. You can easily make this DIY project at home, or it can be a great idea for your school art projects.
🧻 DIY Toilet Paper Rolls Holder—This is a handcrafted project about making a DIY toilet paper roll holder from a plastic bottle for your home decor. It's fast and very easy.
🧻 How to DIY: Tissue Holder
🧻 Life Hack - Bottle as toilet paper dispenser - Useful for camping, boating, fishing and hunting
🧻 DIY—toilet paper roll holder from a plastic bottle—This is how to use waste material into the best product or item. It can be used for decoration and house use and reused, saving the environment from plastic and waste products.
Shopping Suggestions:
 |
| Cat Proof Holder |
 |
| Toilet Paper Cover |
 |
| Pet Proof Holder |

This was obviously taken before people started suing sucker companies for choking their babies to death!
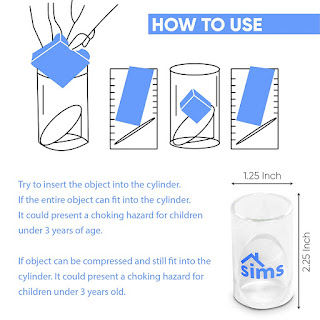 |
| Anti-Choking Hazard Device |
However, commercial choke testers can be complicated to find, expensive, and too small to be effective.
Did you know you already have a frugal baby choke tester in your home? (No, I don't mean the baby...)
How about an empty toilet paper tube!?
Commercial choke testers are made to gov't. regulation size of 3.5 cm (1 3/8") in diameter.
Your ordinary toilet paper tube is 4.5 cm (1 6/8") in diameter.
 |
Any toy or object in your home that fits inside this toilet paper tube can be a choking hazard to your baby or child.
Thanks to Catherine for this Frugal Baby Tip!
 |
| Choking Rescue Device |
Shopping Suggestions:
🧪 Safety 1st Small Object Choking Tester🧪 Safety 1st Small Object Choking Tester
🧪 School Supplies Choke Tube Set
🧪 CDN - Safety 1st Small Object Tester
Save Your Loved Ones From Choking! LifeVac is a patented life-saving device proven to be the most effective way to help a child or adult during a choking emergency.


Layer one crop top, blouse, shirt, etc. over an old T-shirt or tank top (mix or match colors!).
 |
| Nursing Shirts |
The top layer shirt will provide discreet coverage, yet your baby will still have easy access to nurse.
When you lift or shift your outer shirt to nurse, your tummy is fully covered. If you unbutton your blouse to nurse, your cleavage is not exposed.
Your baby's head and your outer garment cover the exposed portion of your breast.
Plus, there are no slits or panels to readjust after feeding!
Thanks to Catherine for this Frugal Baby Tip!
 |
| Nursing Undershirts |
Here are a few more no-sew nursing top ideas!
👶 DIY Nursing Top: Budget-friendly, No-sew, Totally Stylish👶 30 second zero dollar NO SEW nursing tank top
👶 No-sew Nursing Tops
👶 Modest no sew nursing tops
👶 DIY Cute no sew nursing top
Have you ever wished there was an accurate up-to-date website, listing all the breastfeeding laws and their provisions for enforcement - all in one place?
Click for the: Breastfeeding Laws For US and Canada
 |
| Naked Nursing Tank |
Shopping Suggestions:
👶 Nursing Cami Tank Top👶 Long Sleeve Nursing Top
👶 Short Long Sleeve Nursing Tops

 |
| Birdseye Flatfold Diapers |
You can make your own - NO sewing required!
You will need: Two padded training pants (you can also use underpants, but padded training pants will be more absorbent), one or two flat or prefolded diapers, four diaper pins and a waterproof outer cover.
Or use a waterproof covered training pant for your outside layer - for a two-in-one combo!
Using the cloth diaper, fold it into a long thick rectangular pad. Lay this inside one of the training pants, so the folded diaper pad lays down the center of the training pant.
 |
| Credit: Catherine McDiarmid-Watt All rights reserved |
Place another pin through the opposite short end of the diaper pad and back waist. Pin from the outside of the training pant, so as not to cause discomfort to your child.
Next, add the second training pant on the inside of the first, so you now have a training pant | folded diaper pad | training pant sandwich.
Add nylon, vinyl or other waterproof pull-on pants over top of everything. Or check into some of the newer fleece pull-on pants!
 |
| Dappi Nylon Diaper Pants |
baby-likenylon or vinyl pants. Your
bedwetter sandwichnow has four layers - training pant | folded diaper pad | training pant | waterproof cover.
Use the two remaining diaper pins to pin through the three layers - two training pants and one waterproof outer cover - this time placing one diaper pin at each side waist.
Push the pins through the same area as the stitching on the waterproof cover to prevent damage.
These pins help to hold everything all together, and will allow your child the independence to quickly pull up and down their Bedwetter Pants when they need to go to the toilet.
If your child needs even more absorbency, you can add another layer of folded diaper, but this could be very bulky.
These Bedwetter Pants can also be used during the day, for older children not quite ready, or not completely potty-trained.
 |
| Potty Training Pants |
Shopping Suggestions:
🚼 Gerber Birdseye Prefold Diapers🚼 Birdseye Flatfold Cloth Diapers
🚼 Dappi Waterproof Diaper Cover
🚼 Toddler Training Pants
🚼 OsoCozy Diaper Pins
 |
| Baby Stack and Nest Cups |
Save any empty plastic lids like shaving foam and hair spray lids.
Wash well, and give to a baby who can sit up well.
Baby can practice stacking up, nesting inside each other, and banging together to make noise.
Baby Play Mats
Using a small blanket as your base, sew on brightly colored fabric pieces in different textures and sizes to create a play mat.
Attach short ribbon loops to the corners, and you could attach a teething toy, or a rattle or two for extra fun.
 |
| Taggies Lamb Lovey Toy |
Simply roll a clean pair of socks into itself so your baby can practice gripping and throwing.
Stuff with crinkly paper to make a great sound!
Baby Lid Chains
Start saving plastic lids from milk bottle tops, soft drink bottles, etc.
Look for different colored lids.
Punch a small hole into the top of each with a nail, smooth the raw edges, and thread onto a short length of cord or ribbon to create a chain of lids with a rattle.
Thanks to Sharon for this Frugal Baby Tip!
Safety First – Homemade Baby Sensory Toy Safety
-- The smaller the child, the bigger the toy. If the toy can fit inside a toilet paper roll, or it has removable parts that can, then it is not suitable for children under 3 years of age.
Strings
-- Make sure any strings or ribbons are not long enough to wrap around your baby and cut off your baby's circulation. Also, make sure they are firmly attached to the toy.
Supervision of babies with toys
-- Did we mention babies put everything in their mouths? Babies can be easily poisoned if a toy is made from, or coated in, a toxic material. Check out paint and adhesive labels before use. Also, make sure the surface is smooth, with no sharp edges or corners.
It's important to remember any homemade toy can potentially cause choking – no matter how well you've made it. If anyone can pull it apart, your baby can! Keep an eye on your baby at all times.
More: 26 Homemade Baby Sensory Toys

 |
| Honeysticks Beeswax Bath Tub Crayons |
Here's how to make soap crayons for bath-time fun and easy quick clean-up!
I am wondering if we could use cookie cutters or somehow get them into better shapes than just the ice cube tray, but I haven't tried it myself yet.
Ingredients:
🖍️ 1 3/4 cups Soap Flakes (powder)
🖍️ 50 drops food coloring
🖍️ 1/4 cup water
Directions:
🖍️ Mix water and soap flakes together.
🖍️ Add food coloring.
🖍️ Put mixture into an bottle stick ice cube tray.
🖍️ Allow to harden.
🖍️ Break or cut into pieces.
🖍️ Fun to write with on the tub when bathing as well as your face and hands!

Here's a fast and simple way to make all your flat, prefold and shaped diapers into easy Velcro®-closing diapers!
Just cut one piece each of both hook and loop Velcro®.
Sizing: Small - cut 12" (31cm) long; Medium - cut 18" (46cm) long; Large - cut 24" (61cm) long; XLarge - cut 30" (76cm) long.
Trim off all the corners, into curves.
Place the Velcro® pieces back to back (with the hook and loop sides facing out, away from each other.)
 |
| Photo credit: Catherine McDiarmid-Watt |
Sew together, around all four edges.
That's it! One fastener is all you need! If you wish, you could make one or two more, in case one gets soiled or lost.
Is that too much work??
Then you could just buy the One Wrap Velcro straps - no sewing involved!
Care: Wash by hand in the sink and hang to dry for longer wear.
To Use: Simply place the diaper on your baby as you normally would.
But, instead of using pins or clips, simply wrap this Velcro® diaper fastener around the diaper at your baby's waist, with the hook side facing the diaper, overlapping the Velcro® at baby's front (or back, if your baby can undo the strap!) to fasten.
The Velcro® hook part helps to hold the diaper in place.
Make sure the hooks are completely covered by the diaper, or they may irritate your baby's skin.
Thanks to Catherine for this Frugal Baby Tip!
 |
| One Wrap Velcro® |
Shopping Suggestions:
🧷 MPI One Wrap Velcro® Hook/Loop Fastening Tape - White🧷 MPI One Wrap Velcro® Hook/Loop Fastening Tape - Red
🧷 MPI One Wrap Velcro® Hook/Loop Fastening Tape - Green

I re-use an empty Foaming Hand Soap dispenser for all liquid baby soap I buy, and I've found it makes liquid soap go way further.
Shampooing my baby's hair or washing a slippery baby is much easier when I can squirt foam soap out of a dispenser.
 |
| Cuisipro foam pump dispenser |
I usually put an inch of liquid baby soap (Johnsons, Aveeno, etc.) in the dispenser, fill the rest of the bottle with water, give it a good shake, and it's ready to use.
I have also bought an empty Cuisipro foam pump dispenser from a kitchen/bath store, which also works well.
Many products now come in foam pump bottle styles, which can be rinsed out and used for this purpose.
I've been saving lots of money by stretching one bottle of liquid soap about five times instead of using it straight from the container.
Thanks to Suzie Mah for this Frugal Baby Tip!

Here is the diaper wipes recipe I use now:
👶 2 1/2 cups warm water (distilled is best, but I'm lazy)👶 2 teaspoons castile soap or baby shampoo
👶 1 tablespoon baby oil
👶 2 drops tea tree oil
👶 3-5 drops lavender oil
Here's another diaper wipes recipe:
👶 2 1/2 cups warm water👶 2 teaspoons almond castile soap
👶 1 tablespoon sweet almond oil
👶 2 drops tea tree oil
👶 2-3 drops ylang ylang
I think the Tea Tree oil is still necessary to keep in from getting funky.
Thanks to Julie for this Frugal Baby Tip!

🧺 Tip #1 - Use a laundry basket for baby's toys. It will fit right under your baby's crib.
✂️ Tip #2 - Use coloured construction paper (or black, depending on the baby's age) and cut shapes out.
 |
| Multi-Color Construction Paper |
Put on the wall around the baby's change table, but out of the baby's reach.
It helps to distract the baby a bit.
🖼️ Tip #3 - Use putty adhesive, so you don't damage the wall.
Move shapes around once in a while.
🪞 Tip #4 - Plastic pocket mirrors work better for older babies.
Thanks to Renata for this Frugal Baby Tip!

Streaming just got a major upgrade. For the first time ever, Disney has launched ESPN Unlimited, giving fans full, direct access to everything ESPN has to offer. And the best part? It’s now bundled with Disney+ and Hulu for one unbeatable price.
If you’ve been waiting for the ultimate streaming deal, this is it.
What’s Included in the Disney+, Hulu, and ESPN Unlimited Bundle?
This isn’t your average streaming package. Here’s what makes it a game-changer:
-
Disney+: Unlimited access to Disney classics, Pixar favorites, Marvel blockbusters, Star Wars sagas, and National Geographic documentaries.
-
Hulu: Binge-worthy TV shows, original series, hit movies, and next-day access to top network programming.
-
ESPN Unlimited: For the very first time, ESPN fans can enjoy every game, every league, every highlight—direct from ESPN. That means live sports, commentary, analysis, and exclusive programming, all in one place.
Huge Savings for a Limited Time
For a short time, subscribers can lock in this all-in-one streaming bundle for just $29.99/month for 12 months.
That’s a 39% savings every month - the same cost as ESPN Unlimited on its own, but with Disney+ and Hulu added for free.
Why This Deal Matters
In a crowded streaming world, consumers often juggle multiple subscriptions, each adding to the monthly bill. This bundle solves that problem by offering three of the biggest platforms under one roof.
-
Sports lovers can stream every ESPN event.
-
Families can enjoy Disney+’s massive library.
-
TV fans get Hulu’s latest shows and originals.
Instead of paying for them separately, this deal keeps everything simple, affordable, and packed with value.
How to Get the Disney+, Hulu & ESPN Unlimited Bundle
Signing up is quick and easy. For just $29.99/month, you’ll unlock unlimited streaming from three powerhouse platforms. But remember, this special launch price ends soon - and once it’s gone, so are the savings.
👉 Claim the Disney+ Bundle Here (ad)
Final Thoughts
The Disney+, Hulu, and ESPN Unlimited Bundle is more than just another streaming plan - it’s the future of entertainment. Whether you’re a sports fanatic, a movie buff, or a family looking for something for everyone, this package delivers it all.
And at 39% off, it’s one of the best streaming deals available today. Don’t wait - grab it while it lasts.
More Frugal Blogs and Websites:
• Born to Love: All your cloth diapering needs, and much more - naturally! We are strong advocates of the personal, social, and environmental benefits of natural parenting.
• Frugal Freebies: The latest free stuff, free books, shopping deals, discount coupons, and other ways to save money!
More blogs to visit:
• Life Begins... - Pregnancy stories of loss, hope, and help
• Pregnancy Stories by Age - Daily blog of hope and inspiration!
• You Can Get Pregnant in Your 40s - Sharing articles, discussing options, and suggestions
• Stories of Pregnancy and Birth over 44 - sharing news stories I find online, for inspiration!

I had a dream last night about my baby product business, Born to Love, which I started way back in 1982!
I woke up and felt a strong need to create a new Facebook group for it.
As if I needed more work! 🤣
Do you know anyone who uses cloth diapers, or is considering it?
I have many articles to share, along with the baby product deals.
Join our new group: Facebook.com/groups/diaperdeals
More blogs to visit:
• Life Begins... - Pregnancy stories of loss, hope and help
• Pregnancy Stories by Age - Daily blog of hope and inspiration!
• You Can Get Pregnant in Your 40's - Sharing articles, discussing options and suggestions
• Stories of Pregnancy and Birth over 44 - sharing news stories I find online, for inspiration!
Popular Posts
-
Thanks to Cathy for this Frugal Baby Tip! Salt whitens, brightens and deodorizes - so I was wondering if it would help with washing diapers?...
-
 Aching breasts? Need some relief? Cut out four 6 inch circles of a soft 100% cotton (prewashed) fabric, such as cotton knit, flannelette...
 -
 Would you like to prevent your toddler or pets from unrolling the entire roll of toilet paper, stuffing it into the toilet, or trailing...
 -
 Baby Stack and Nest Cups Baby Stacking Toys Save any empty plastic lids like shaving foam and hair spray lids. Wash well, and give to ...
 -
 Just wanted to share with someone who understands... Tonight I made Benjy the cutest wool soaker out of a shrunken wool sweater vest. ...
 -
 Do you want to make wool soakers or diaper covers for a baby, but you are a crocheter, not a great knitter? I found a few patterns, and I a...
 -
 Ingredients: 🧼 one bar Fels Naptha soap , grated (2-3oz bars or 1 4-5.5oz bar) (the finer grated the better) 🧼 one cup washing soda 🧼 ...
 -
 Thanks to Andira for this Frugal Baby Tip! I thought I'd like to pass this to you moms. It's a wipe recipe, maybe it'll be us...
 -
Thanks to Cathy for this Frugal Baby Tip! Is it really worth it to continue to cloth diaper part-time? Think about how many times your littl...





Recent Comments